Winter is the perfect time to hunker down and work on your home's interior. Not only is it an opportunity to spruce up problem areas, but you can change the look and add a personal touch to your living space. It's always a source of comfort staying indoors where it's warm to work on DIY home projects. And by next season, your home will look highly improved when the spring sun hits it.
Here are four easy indoor improvements, followed by a fifth activity for those who are in a building mood.
WARM UP THE WINDOWSILL
Block winter's chill and give your home a new look at the same time. This Old House suggests making a set of modest window curtains, all of which can come from repurposed materials. Thin segments of metal piping can be spray-painted to become beautiful curtain rods, whereas you can add shower curtain hooks to hang fabric that keeps indoor heat from escaping through the crevices you have no control over. Include ribbon ties when you want to pull the curtains back, and close them to stay cozier while you're inside.
RESTORE YOUR KITCHEN CABINETS
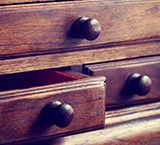
Completely change the look of your eating space by restoring kitchen cabinetry back to its original wood. Many homes have painted kitchen cabinets, and you can always slap on another coat of paint. With a little more work, however, you can fall back in love with the gorgeous look of oak or elm. Start by stripping off all the paint, using nontoxic chemicals in a ventilated work area (with plenty of safety equipment). Once the paint is gone, use a power sander to file down old finish that may still be on the material. When the cabinets are stripped, sanded and dried, stain them to bring out their natural beauty.
After the work is over, you'll wake up to vintage cabinets that look brand new. Keep them beautiful by using the right cleaning products, rather than more abrasive surfactants that are best saved for tile. Murphy® Oil Soap and similar wood-friendly solutions keep even the softest woods looking great.
REUPHOLSTER YOUR DINING ROOM CHAIRS
You can make old dining room chairs look brand new with just a little adjustment to the upholstery. Turn the chair over and exert pressure on the bottom of the seat, popping this chairboard out of the chair itself. Carefully pull away the seat's old fabric and set aside. Remove as much padding as you can from the chairboard and replace with new foam padding. Take the old seat's fabric and use it as a pattern to cut your new fabric seat, pulling it tightly across the refreshed padding and pulling it to the back of the chairboard. Use a staple gun to secure the new fabric to the underside of the board, pulling it tightly to avoid lingering wrinkles on the upside surface. Repeat this process for every chair that calls for a quick facelift.
TRANSFORM YOUR BOOKCASE
It's no fun to buy new furniture in the winter, when the roads are slippery and a freak snowfall could cancel all your plans. So, transform your bookcases, rather than replacing them. Remove the backside of a neglected bookcase and apply a new piece of plywood. Paint or stain the backside of the plywood as desired, but on the inside, cover the plywood with decorative paper or a contrasting paint color. This creates a fun effect when you nail the new backing to the original frame.
BUILD A FAUX FIREPLACE
Ready for something the whole family can get in on? Everyone wants a fireplace in winter, when just seeing a hearth can make the room feel cozier. Build your own faux fireplace to become a permanent part of your home, a holiday decoration or a fun seasonal winter touch. Start with a knife or saw, several pieces of plywood and a large piece of foam; the latter is your fireplace unit. The faux fireplace should have a flat back with a recessed center to represent the firebox where you'll put your logs, candles and similar decoration. With foam in the right color and mounted against a wooden frame, you'll have a warm addition to your living room or den, indistinguishable from the real thing.
To build out a recessed center, notch a large box out of the foam going all the way to the end of the fireplace, but don't break through the back wall. Glue this foam backing to a sanded plywood board, and do the same with the bottom to create a base. Cover the front-facing areas of the foam with more glue, where a few textured and sanded pieces of plywood can create a natural facade. Use a set of small nails to secure the edges, then paint or stain the plywood. Add pieces of glass and rocks or paint the foam in a stone color to complete your finish. Two final plywood boards, nailed together and cut to size, can serve handsomely as a mantel.
Stay indoors this winter, and work on your home. Spruce up your furnishings, add something new and stylish to your space and spend your time on any one of these DIY home projects. Your home will feel warmer, look fresher and feel a lot more like your own.
This article was brought to you by Colgate-Palmolive Company, the makers of Murphy® Oil Soap. The views and opinions expressed by the author do not reflect the position of the Colgate-Palmolive Company.